By Scott Beveridge
MONACA, Pa. ? It's become a tradition for the past three years to join a friend in creating a Christmas craft project.
Last December Mary Margaret and I made a miniature house from part of a cardboard half-gallon milk carton iced in whipped melted wax, in a tradition my mom started when she was in her 30s. It worked out much better then with five or six people sitting around the table putting those things together in the 1960s than it did last year with just two pair of hands in Mary's kitchen in Monaca, Pa. Our version of the project was too much work, even though the end result turned out pretty damned cute. But, remind me to never do that again.
In 2010 we covered canning jars with Elmer's Glue-coated colored tissue paper cut into shapes of evergreen trees to create faux forest luminaria.
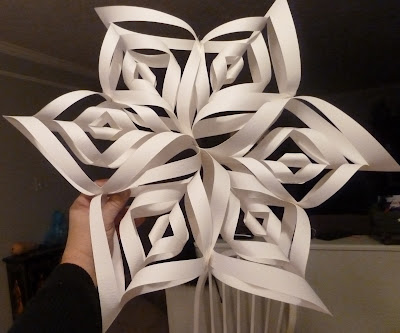
This year it was her idea to make the paper snowflake, above, in what probably was my favorite project, thus far. I mean we could probably sell those things in a few years at craft shows to helps us pay for our prescriptions in our retirement years.
And, making one of them is not a difficult as it might appear at first blush.
You need to start out by cutting paper into six 8 1/2-inch squares. A heavier weight paper works best as those made from printing paper are kind of floppy, but still cool.
Fold each square into a triangle, as shown, above.
And, then fold that a second time to create a smaller triangle. We're on a roll.
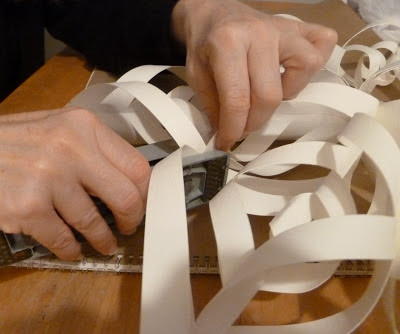
With the folded crease toward your right, make four cuts parallel to the side at your left, as shown, above, stopping short about a quarter of an inch from the top. I used a tile cutter and metal ruler because this snowflake was made with sheets of heavy weight watercolor paper. A sharp pair of heavy-duty scissors would likely have worked, as well.
This is how the cuts should look by now. No need to measure them or worry that they need to be measured out to precision. This is a snowflake, remember. It's not supposed to be perfect.
Now comes the fun part. Starting with the smallest cuts, roll the paper together, as shown, and attach the edges, preferably with acid-free clear tape.
Then, turn over the square and roll and tape the next section. Repeat that step until your snowflake section looks like this:
Seriously. How cool is that. The final steps work out a lot better with a second set of hands and a small stapler.
Lastly, individually staple together the outer ring of the snowflake where their top edges naturally come together. This worked out so well that I think we'll make another using the fancy paper of a white wedding gift bag purchased at a mall card shop.
Happy holidays from Travel with a Beveridge.
Source: http://scottbeveridge.blogspot.com/2012/12/paper-snowflake-craft-project.html
solid gold dancers shaun cassidy scrabble word finder scrabble helper salons


Keine Kommentare:
Kommentar veröffentlichen